Intro
The room I use as an office is isolated from the thermostat that monitors it. So it's common that the heat or AC can come on later than it should and/or stay on for longer than it should. I wanted a quick way to check the heat and adjust it if necessary without the distractions involved with picking up the phone or web browser. I needed an analog interface to Nest's digital system.
Enter the Nestlet. An RPI0W powered interface for the Nest API.
Demo
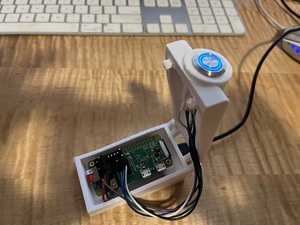
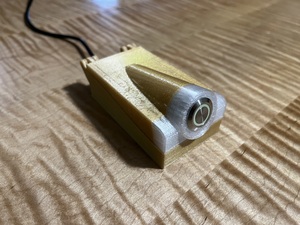
Below you can see the device I came up with. The UX consists of an RGB illuminated button allowing me to see whether or not the heat or AC system is currently on, and allowing me to toggle that activity by pushing the button.
The device contains its own web server that handles authentication with the Nest Service and lets you choose which Nest thermostat the button controls.
Setup
I started off with a poncho style Nerves app generated as below.
mkdir nestlet_root
cd nestlet_root
mix phx.new nestlet --no-ecto
mix nerves.new fw
To get the necessary functionality I needed to install a couple of very useful packages vintage_net_wizard and pigpiox.
vintage_net_wizard provides you with a turnkey UX for logging on to a wifi network. The library lets the RPI0 create its own wifi network that you can join and choose from the available networks to provide credentials for and join. It's a neccesary feature for anything beyond hard coding network credentials and its great to get it with so little effort.
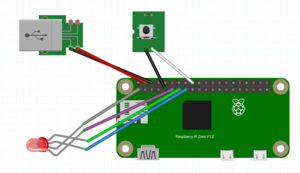
pigpiox makes it easy to montor, read and write to the RPI0's gpio pins. We'll use it to interact with the light and button.
I like getting a new project up and running on native hardware and wifi from the beginning. Almost all of the development can be done from the host laptop, but it's easy to push updates to the device with mix upload nestlet.local. Doing so frequently can help you find issues early. Being on wifi early frees you from being connected to the device by USB.
For anyone following along the code is available at github.
Software
The functionality is provided by 4 modules implemented using the GenServer pattern. GenServers are an Elixir behavior that facilitates starting a child process and sending it messages, to possibly receive replys.
These GenServers are included in the applications supervision tree so they will be restarted automatically if one crashes. This gives our device the kind of robustness we love about Elixir and the BEAM.
The first is Nestlet.Nest.State, which uses the GenServer to store state in memory, a common use case for GenServers. This module does include some extra functionality though, as it persists some state to disk, and it broadcasts any updates to subscribers.
CubDB is a disk based key-value store that's lightweight enough to make it a great fit for Nerves projects. We'll use it to persist the state we need to keep working across device reboots.
Any changes in state are broadcast using Phoenix.PubSub. This makes it easy to add components to a project without the publisher knowing. In this project the subscribers will be the RGB light and any LiveView pages that are open, allowing all parties to see updates immediately.
  def set_state(field_list),
    do: GenServer.call(__MODULE__, {:set_state, field_list})

  def handle_call({:set_state, fields_list}, _from, state) do
    new_state =
      state
      |> struct(fields_list)
      |> struct(last_update: DateTime.utc_now())
      |> maybe_persist_data(state)
      |> publish()

    {:reply, new_state, new_state}
  end

  defp maybe_persist_data(new_state, state) do
    maybe_persist_field(new_state, state, :access_token)
    maybe_persist_field(new_state, state, :refresh_token)
    maybe_persist_field(new_state, state, :current_device_id)

    new_state
  end

  defp maybe_persist_field(new_state, old_state, field) do
    new_value = Map.get(new_state, field)

    if new_value == Map.get(old_state, field) do
      :ok
    else
      CubDB.put(database_name(), field, new_value)
    end
  end

  defp publish(state) do
    Phoenix.PubSub.broadcast(Nestlet.PubSub, "devices", {:state_updated, state})
    state
  end
Nestlet.Nest.Heartbeat is a GenServer that uses its child process as a polling mechanism. It uses Process.send_after/2 to call the Nest service after the specified time period, or 10 minutes if it received a rate limiting error. That bit of code is shown here.
  def handle_info(:check_devices, hb_state) do
    State.get_state()
    |> Service.fetch_and_update_nest_state()
    |> reschedule_device_check(hb_state)

    {:noreply, hb_state}
  end

  defp reschedule_device_check(%State{is_rate_limited?: true}, _hb_state),
    do: Process.send_after(self(), :check_devices, @ten_minutes, [])

  defp reschedule_device_check(_state, %__MODULE__{beat_interval: beat_interval}),
    do: Process.send_after(self(), :check_devices, beat_interval, [])
Device App processes
Fw.RgbLight uses its child process to listen for messages from Phoenix.PubSub. Since all state changes are broadcast it's easy for the RgbLight to set its color accordingly. It responds to these using a software PWM to set the color of the RGB light on the button. The Pigpiox library makes it easy to setup the PWM as well as as set the values.
  @impl true
  def handle_info({:state_updated, nest_state}, state) do
    state =
      nest_state
      |> color_for_current_device()
      |> do_set_color(state)

    {:noreply, state}
  end

  defp do_set_color(color, state) do
    set_gpio_pwm(color, state)

    state
  end

  defp set_gpio_pwm({red, green, blue}, %__MODULE__{
         red_gpio_pin: red_gpio_pin,
         green_gpio_pin: green_gpio_pin,
         blue_gpio_pin: blue_gpio_pin
       }) do
    Pigpiox.Pwm.gpio_pwm(red_gpio_pin, red)
    Pigpiox.Pwm.gpio_pwm(green_gpio_pin, green)
    Pigpiox.Pwm.gpio_pwm(blue_gpio_pin, blue)
  end
Fw.PushButton is the last piece of functionality. It sets up a listener with Pigpiox and waits for the button press.
When pressed, the device determines the desired temperature and sends off the command to the nest API to change the target temperature. Then
it queues up a message to reset the temperature and sets it to be sent in 10 minutes. The original temperature is included in the message, making it easy to reset the temperature when the message is received.
In the case where the button was held down for more than 5 seconds VintageNetWizard is invoked, allowing the user to join a new wifi network.
  @impl true
  def handle_info({:gpio_leveL_change, _, 1}, %{last_mousedown: last_mousedown} = state) do
    Logger.info("handle mouse up")
    elapsed = :os.system_time(:millisecond) - last_mousedown

    cond do
      elapsed > 50000 ->
        :ok

      elapsed > 5000 ->
        VintageNetWizard.run_wizard()

      true ->
        Logger.info("bumping device")
        handle_button_click()
    end

    {:noreply, state}
  end

  @impl true
  def handle_info({:unbump_temp, device_id, target_temp}, state) do
    Logger.info("unbumping temp")

    nest_state = State.get_state()
    device = State.get_device(nest_state, device_id)

    Service.set_thermostat_target_temp(nest_state, device, target_temp)
    State.set_state(bumped_temp: nil)

    {:noreply, state}
  end

  defp handle_button_click do
    %{is_bumped?: is_bumped?, current_device_id: current_device_id} =
      nest_state = State.get_state()

    if not is_bumped? do
      %{
        temperature_set_point: temperature_set_point
      } = device = State.get_device(nest_state, current_device_id)

      new_temp = bumped_temp(device)

      Service.set_thermostat_target_temp(nest_state, device, new_temp)
      State.set_state(is_bumped?: true)

      Process.send_after(
        self(),
        {:unbump_temp, current_device_id, temperature_set_point},
        @ten_minutes
      )
    end
  end
Web UX
The last piece of software is the Web Interface. It consists of a single LiveView route that prompts you to enter an auth token from Google and then shows the thermostats on your Nest network.
The steps required to set up a google account and fetch your auth tokens are not starightforward. Luckily for me it's described in this blog post better than I could explain it. So follow that link if you have trouble setting it up. When you've finished put your google project_id, oauth_client_id and oauth_client_secret into the config and the app should be ready to run.
With all of the other changes as documented in this commit are made you should be able to get to the following pages, in both your development environment and on the device.
The auth dialog box is looking for the referral URL you get at the end of the auth process. Nestlet will take the pasted URL and parse out the google auth token, allowing your device access to the Nest system.
Then all you have to do is choose which thermostat the Nestlet should represent.
Hardware
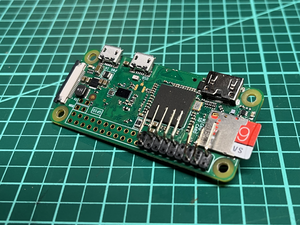
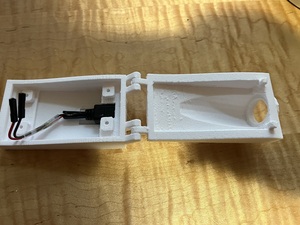
Hardware wise I'm using an RPI0W v1.1, its cheap and small and more than capable enough for the task.
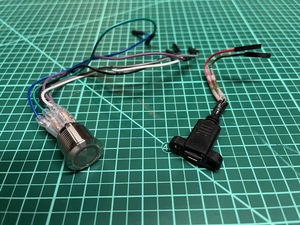
The Adafruit RGB button serves both as my status light and my
button. It looks great and is solid enough that it can withstand repeated pressing. In addition I've modified an
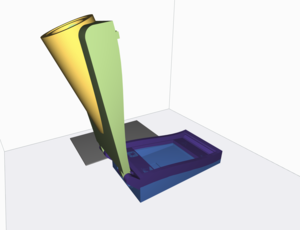
Adafruit USB panel to use as my power source. I designed the case in
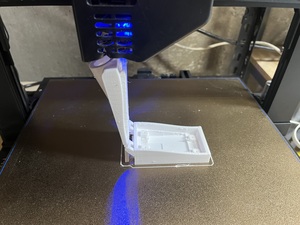
OpenSCAD to print in place with the hinge. Here's a link the the models on thingiverse.
Summary
It has been a while since I built my last Nerves device and it went well. The scalabilty of the BEAM is one of its best features, it runs as well on big servers as it runs on small ones. Nerves continues to provide a great environment to develop and deploy projects.
The device is unobtrusive and would be useful in any situation that needs a light and a button. It's earned it's place on my desk helping keep temperatures regulated.
